Internal Ticketing Process
Internal process to create tickets to track work items from Clients.
- Customer submits issue by emailing support inbox (support@datagration.com) or CSM forwards customer's issue to support inbox from their own inbox
- Once email is received in the support Inbox, it will show within the "Inbox" tool under the "Conversations" tab within HubSpot
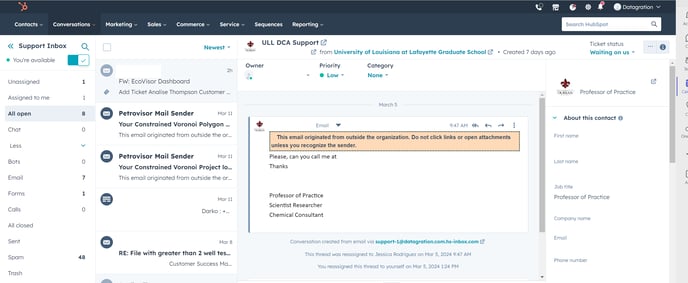
- Next, a ticket can be created to track the issue and collect other customer data for recordkeeping purposes.
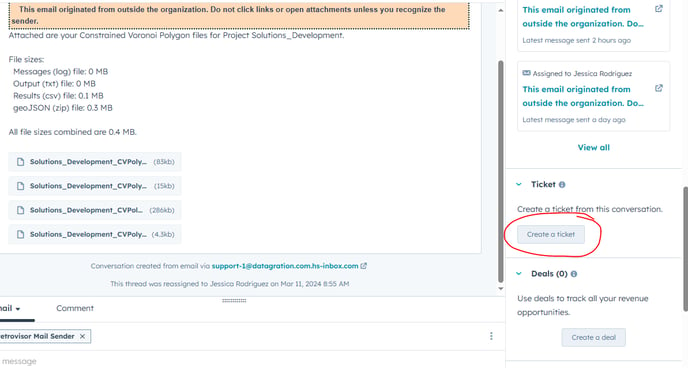
- On the righthand side of the screen, scroll down to the "Ticket" option and click the "Create a ticket" button
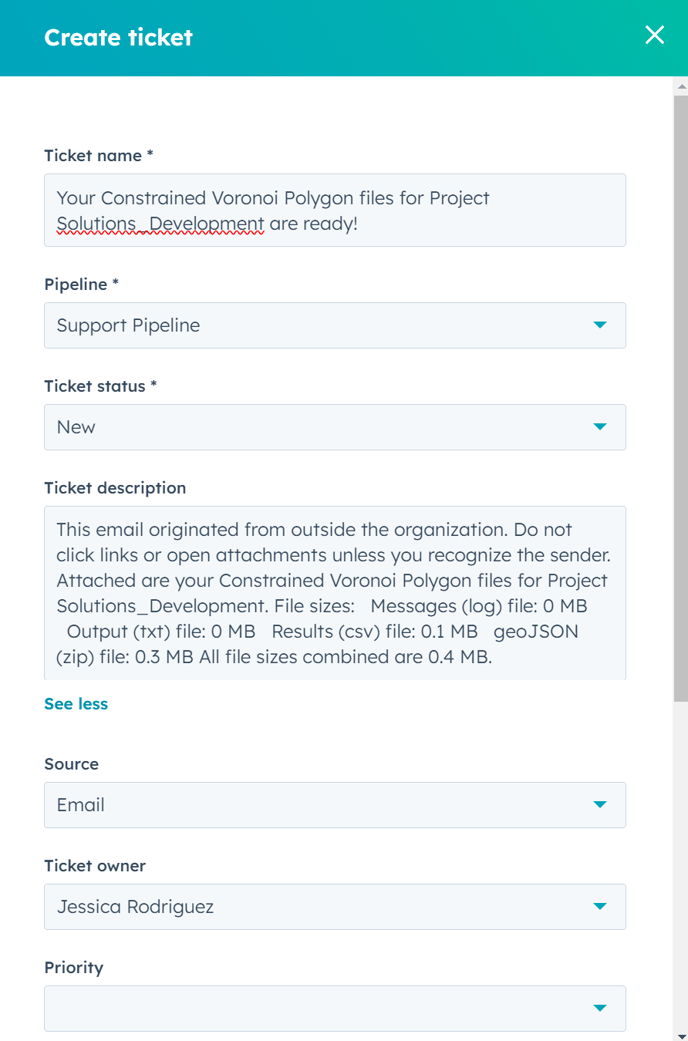
- The righthand popup menu will change to the "Create ticket" window. Here you can change the ticket status, edit the ticket description, the ticket owner, as well as assign a priority level, ticket creation date, and ensure the correct customer information is being tracked by HubSpot. Click "Create" once all fields have been edited/selected
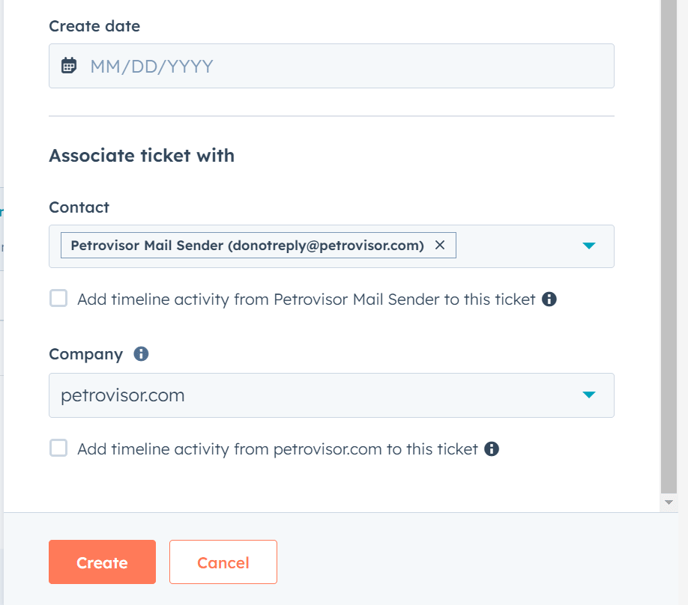
- Upon creating a ticket, the contact associated with the ticket will receive an email informing them of the ticket's creation
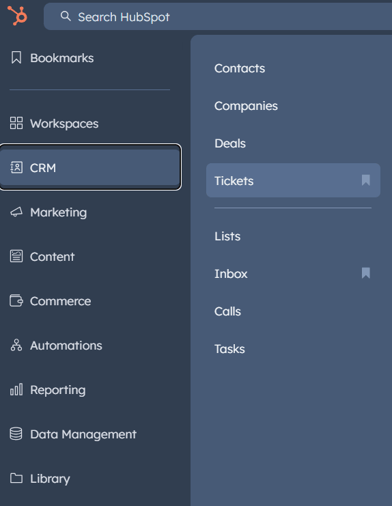
- Tickets can be viewed by navigating to the CRM tab on the right and selecting "Tickets"
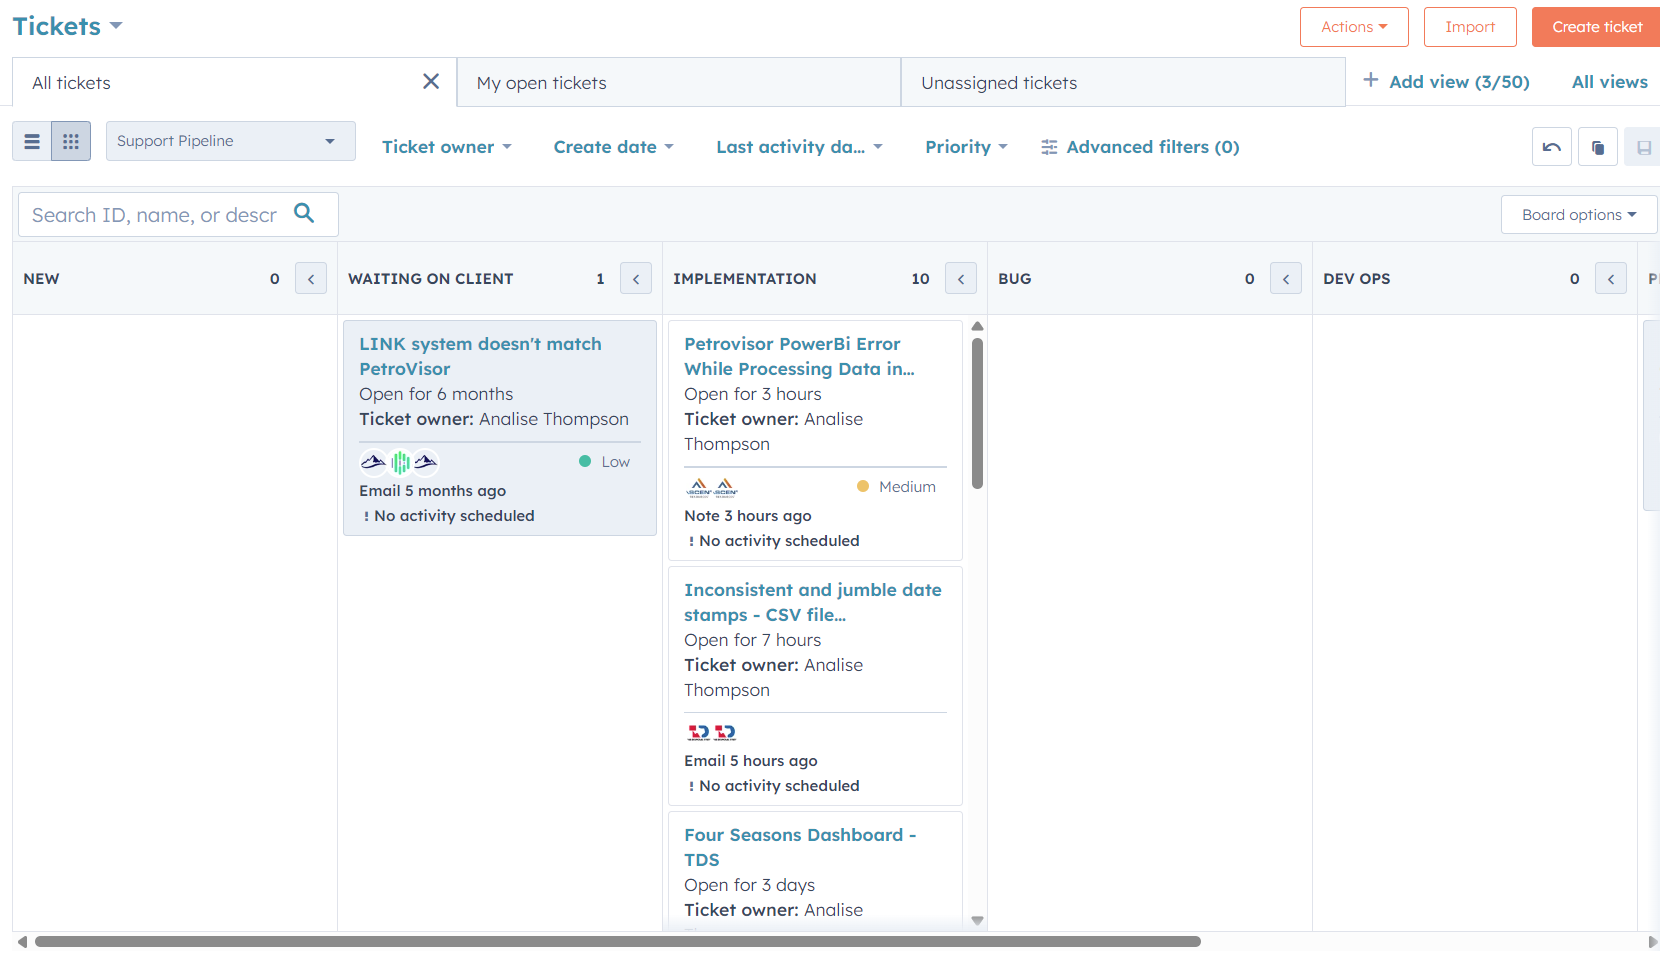
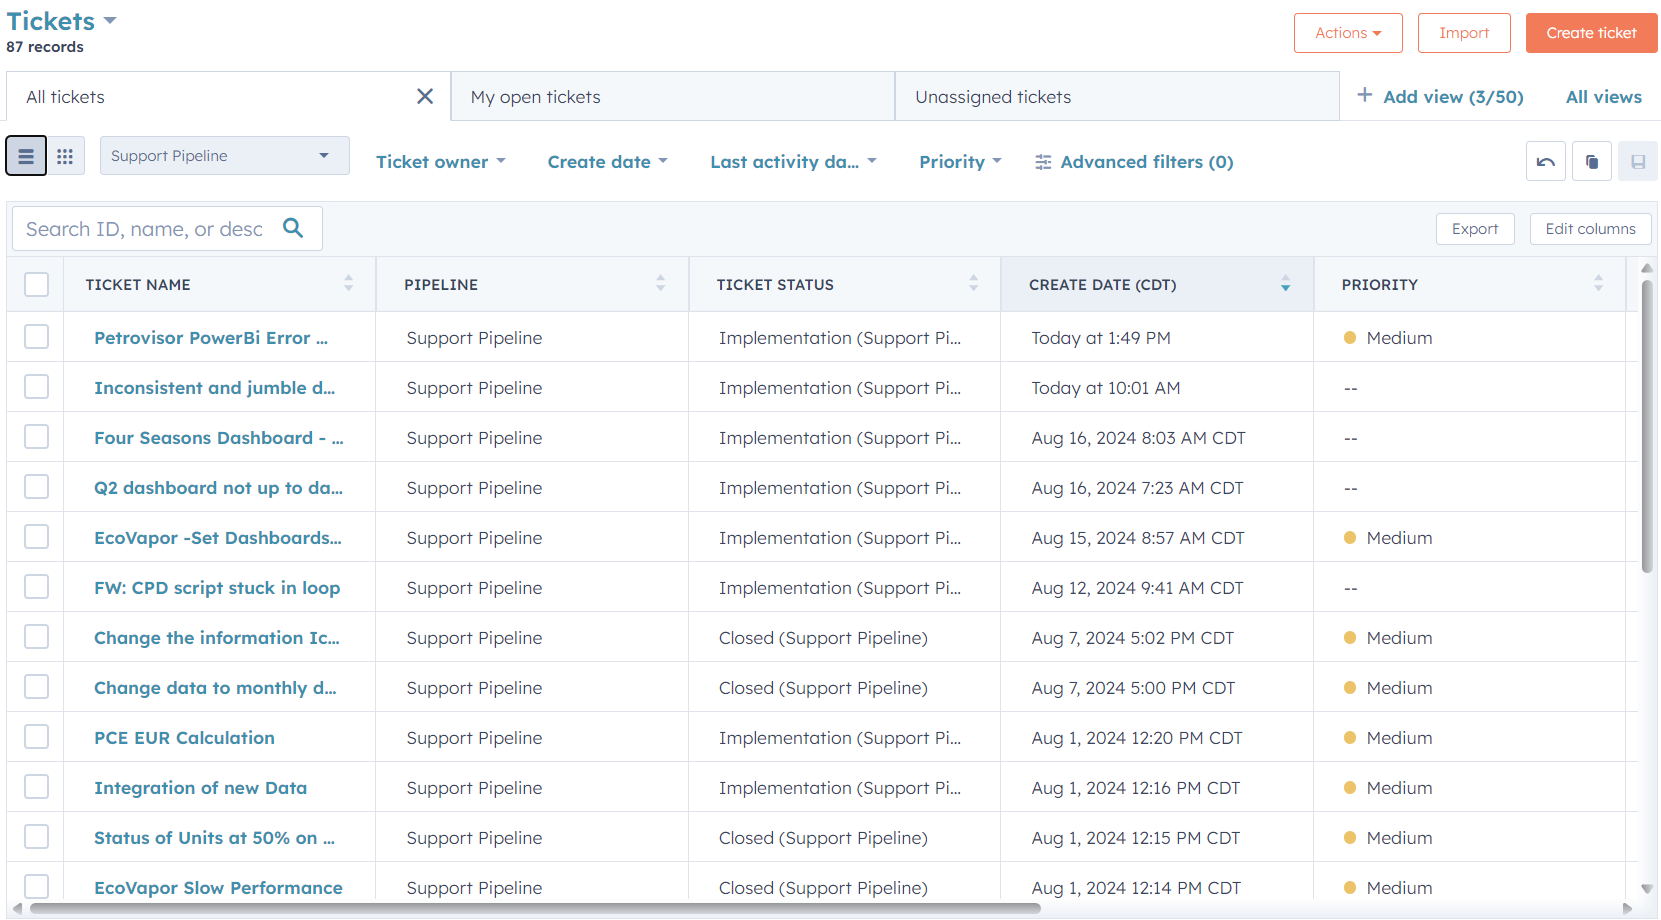
- Upon pulling up Tickets, customer support tickets will be displayed in boards. New tickets will automatically show in the first board. "Ticket Status" and "Priority" need to be adjusted once a ticket is created or closed.
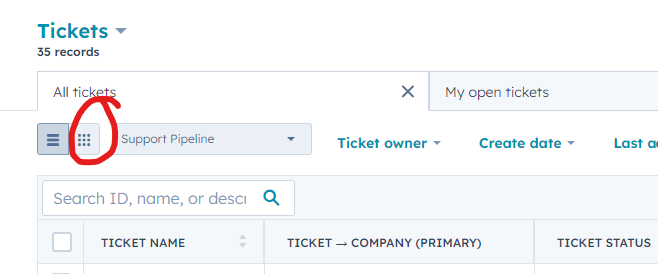
- The Ticket view can also be adjusted to a Kanban-board style view of tickets by status
- Click the "board" view button
- And the Ticket board will be shown as below
