In order to add layers, you must have a mapbox account.
Below are the steps to add the Voronoi and Well Layers to Maps.
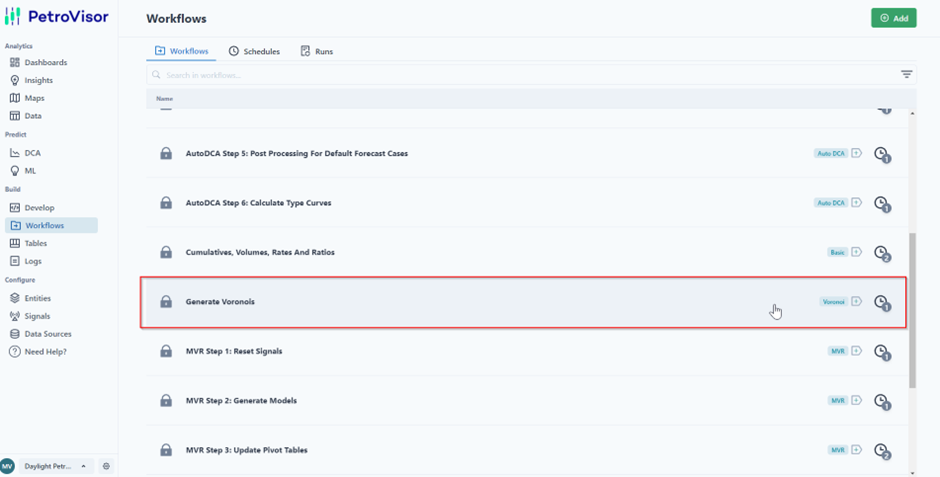
- Run the Generate Voronoi Workflow.
- Download and upzip the file from the workflow generated email.
- Log into Mapbox.
- Add the files to Mapbox.
- Publish Mapbox.
- Add Mapbox credentials to the workspace.
Run the Workflow
- Run the Generate Voronois workflow.
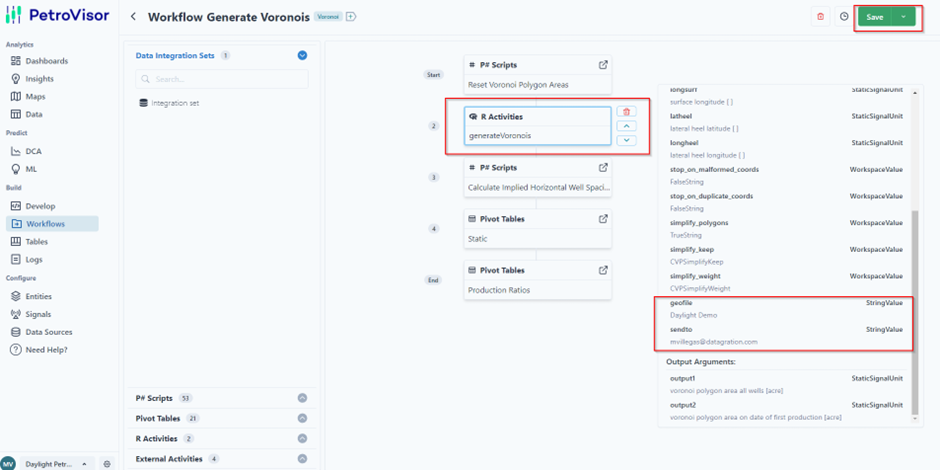
- Click on Voronois, click in R activities. Change Geofile and sendto and save it.
Download and unzip the file.
- Once you receive your voronois emails, unzip the files in a new folder.

Each file in the zip file will have to be placed in the appropriate area in mapbox.
In Mapbox
Go to https://studio.mapbox.com
Datagration will have to share the style. Here is the how to share a style from Mapbox:
Add files to Mapbox
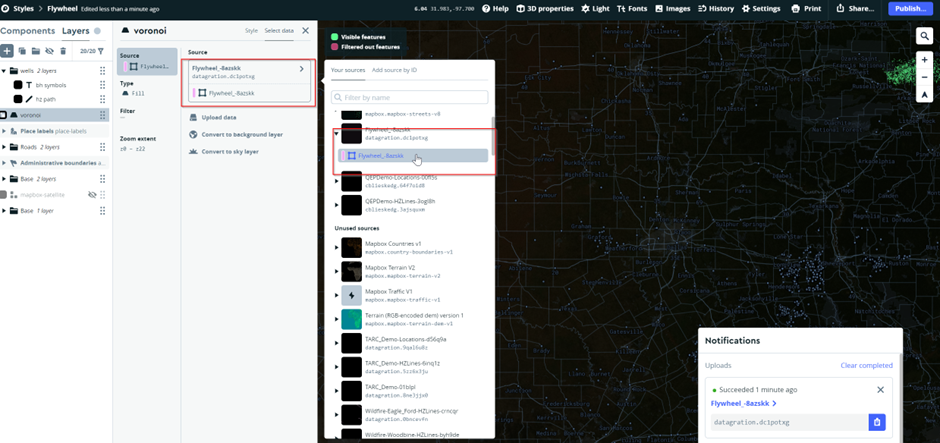
Voronoi File
- Select the Voronoi section
- Select data
- Upload data

- From the emailed files, select the GEOJSON File.

- Select the correct source in Mapbox after upload.
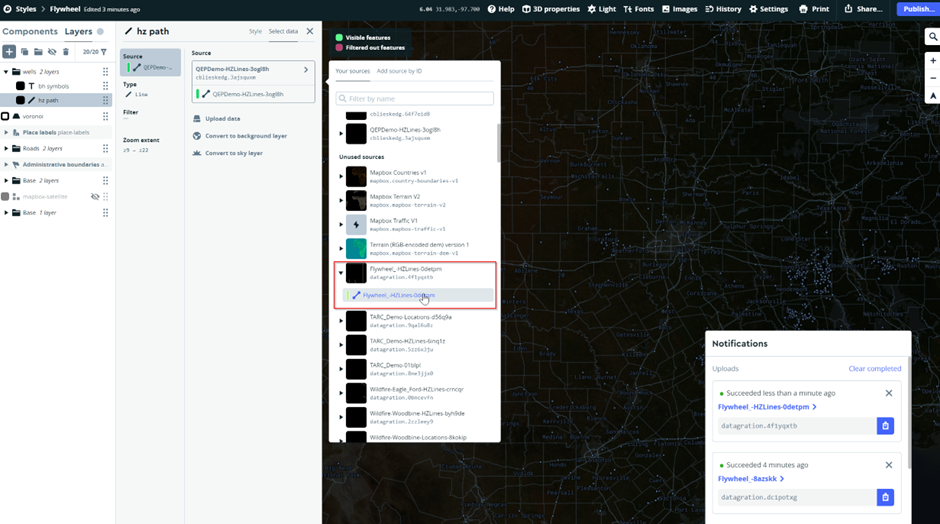
Horizontal Path
- Select the Section for the hz path.
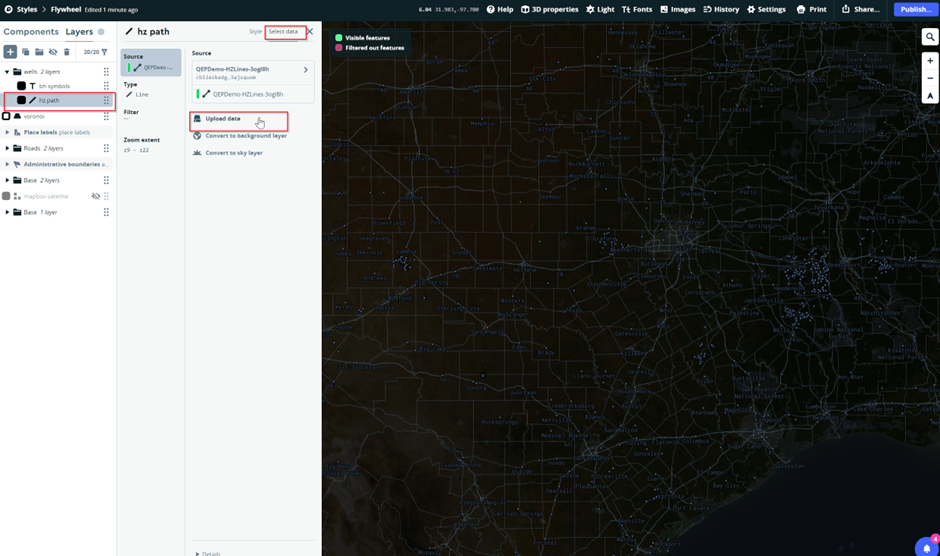
- From the email, select HZLines file.

- Drag and drop your File LINES from your unzipped data and Confirm.

- Select your lines file.
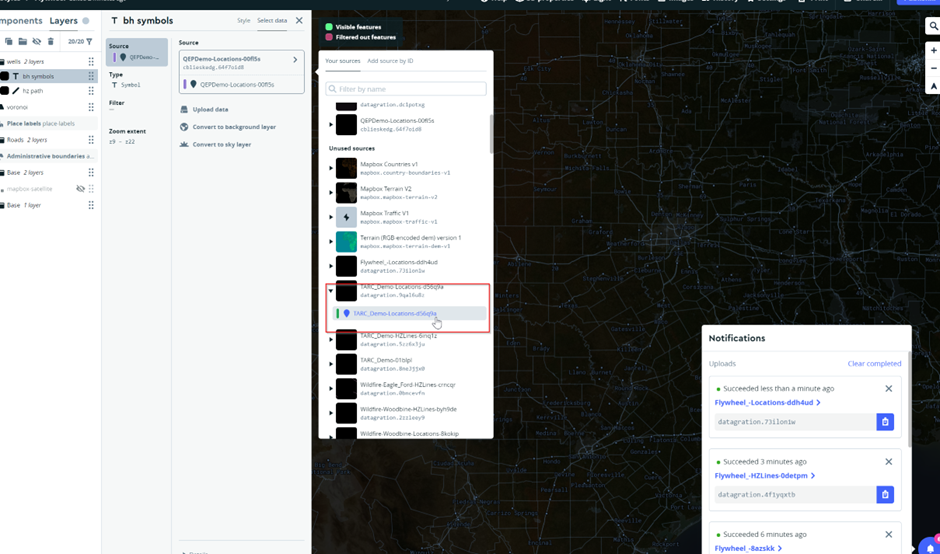
Location File LINES
- Select Data for your Locations.


- Drag and drop your file LOCATIONS and confirm.
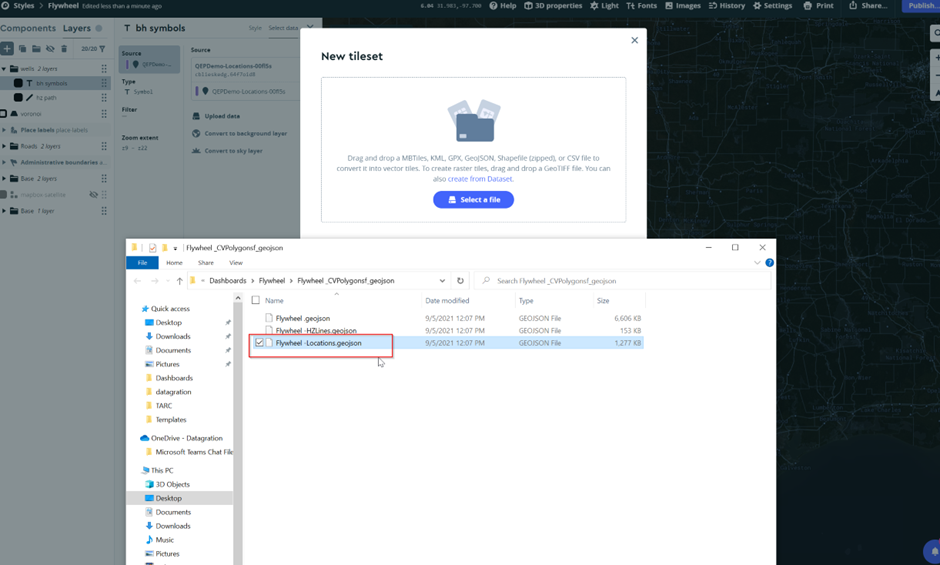
- Select your Locations source.
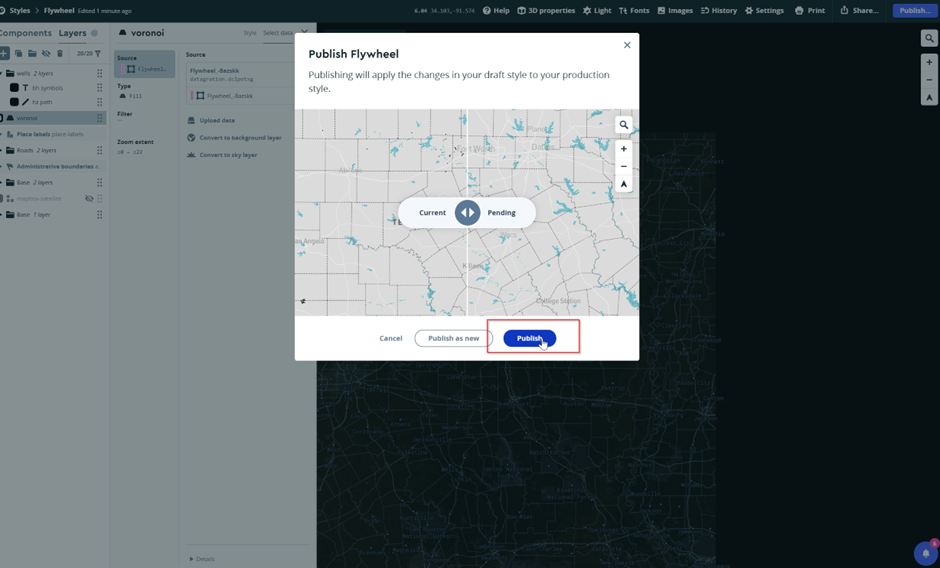
Publish
- Publish.
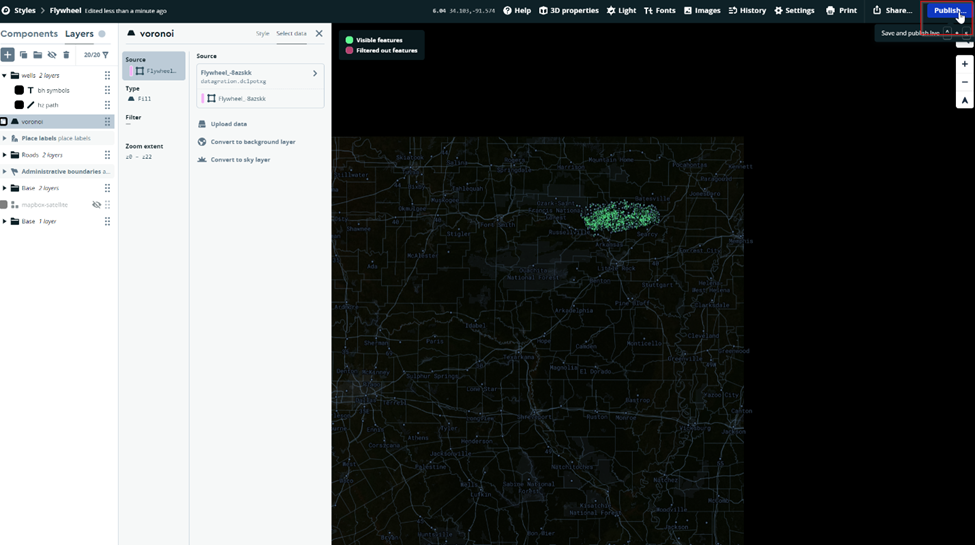
- Publish.
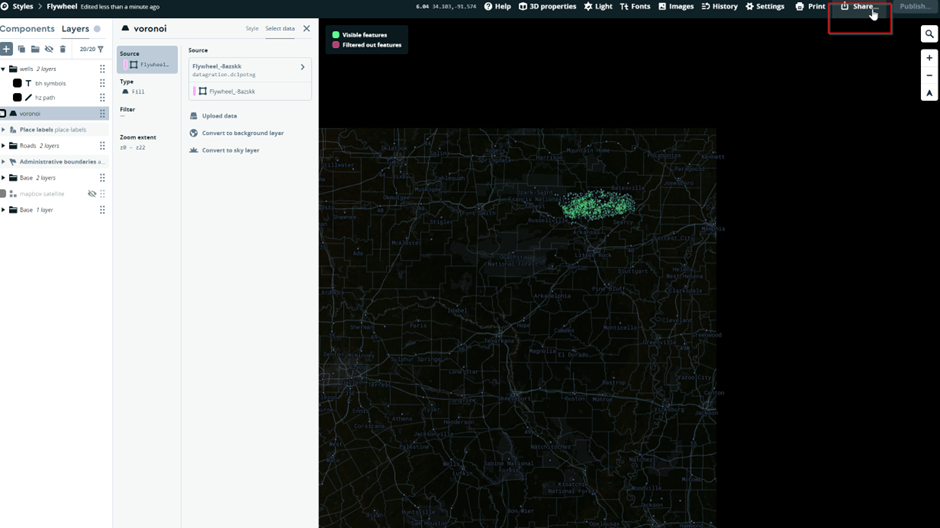
- Click in Share.
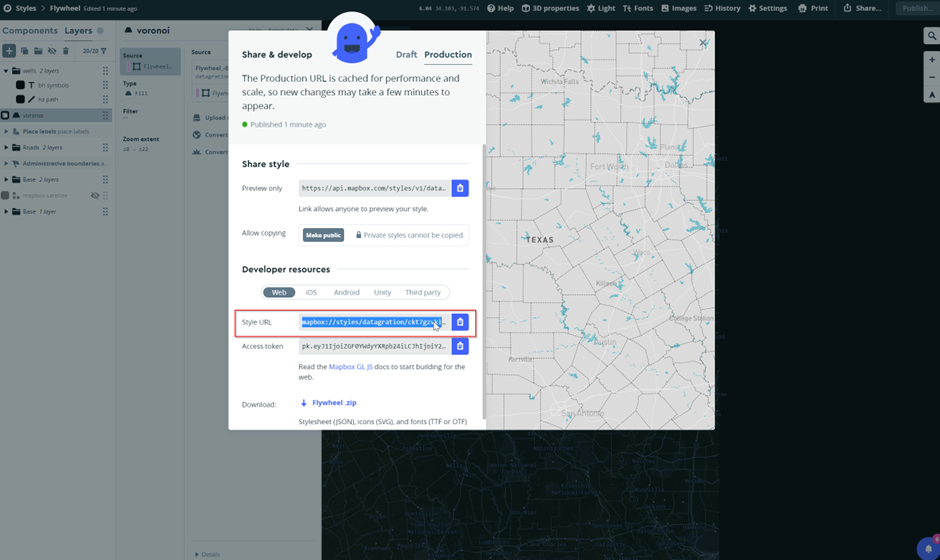
- Copy the Style URL.
Add credentials to Mapbox
- Go to Maps in the platform.
- Click on the Settings Gear.
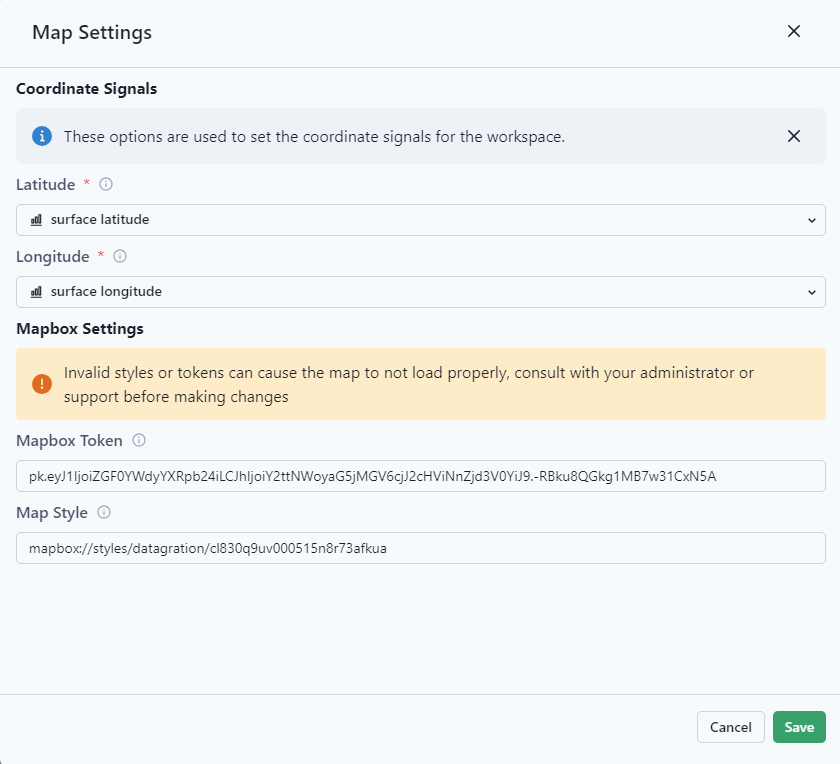
- Add the Mapbox Token and the Map Style.
- Save.
- Reset Cache.
- QA / AC the workspace map.
Power BI Mapbox settings
If adding to a mapbox stored inside a Power BI,use the following settings:
